 Save
Save There's something magical about the smell of butter and sugar creaming together on a cold March afternoon, especially when you know those shamrock cookies are destined for a kitchen full of people you love. My neighbor knocked on my door one St. Patrick's Day morning with that hopeful look—no plans, no decorations, just the idea that maybe we could make something festive together. I pulled out my shamrock cutter, still dusted with flour from the year before, and we spent the next few hours turning simple dough into little edible celebrations. By the time the royal icing started flowing like emerald green rivers across cooling cookies, we were both laughing at the mess and planning next year's batch already.
I'll never forget the first time I brought a box of these to my office party, watching my coworker's eyes light up when she bit into one and found that perfect balance of sweetness and subtle almond. She asked if they were homemade, and when I nodded, she actually came back for three more before the morning was over. That's when I realized these cookies weren't just about St. Patrick's Day anymore—they became the thing people asked me to make year after year.
Ingredients
- Unsalted butter (1 cup, softened): Softness is your best friend here—if it's too cold, your dough will be stiff and your cookies tough, so leave it on the counter for about 30 minutes before you start.
- Granulated sugar (1 cup): This is what gives the cookies their structure and that slight crispness at the edges, so don't skimp or substitute.
- Large egg: Room temperature eggs mix in more smoothly and create a more tender crumb than cold ones straight from the fridge.
- Pure vanilla extract (1½ teaspoons) and almond extract (½ teaspoon, optional): The almond extract adds a subtle depth that makes people wonder what your secret ingredient is, but vanilla alone works beautifully too.
- All-purpose flour (2¾ cups): Measure by spooning into your measuring cup and leveling off—scooping directly from the bag packs it down and makes your cookies dense.
- Baking powder (½ teaspoon): Just enough to give the cookies a gentle lift without making them cake-like.
- Salt (½ teaspoon): This tiny amount wakes up all the flavors and balances the sweetness in ways you might not expect.
- Powdered sugar (3 cups, sifted) for icing: Sifting removes lumps that would ruin your smooth icing finish, so don't skip this step.
- Meringue powder (2 tablespoons): This is what hardens the icing to a glossy finish—it contains egg whites, so check if anyone has allergies.
- Warm water (4–5 tablespoons): Add it gradually because you can always add more, but you can't take it out once you've poured it in.
- Green gel food coloring: Gel works better than liquid food coloring because it won't thin out your icing, and a tiny drop goes a long way.
Tired of Takeout? 🥡
Get 10 meals you can make faster than delivery arrives. Seriously.
One email. No spam. Unsubscribe anytime.
Instructions
- Cream the butter and sugar into clouds:
- Beat your softened butter and sugar together until the mixture is pale, fluffy, and about double in volume—this takes 2 to 3 minutes with an electric mixer. You'll know it's ready when you run a spatula through it and it feels light and airy, almost like whipped clouds.
- Bring in the egg and extracts:
- Add your egg, vanilla, and almond extract (if you're using it), beating until everything is well combined and the mixture looks smooth. Don't worry if it looks slightly curdled at first—keep mixing and it will come together beautifully.
- Marry the dry ingredients gently:
- Whisk your flour, baking powder, and salt together in a separate bowl, then add them slowly to your wet mixture while mixing on low speed. Mix just until you don't see any white streaks of flour anymore—overmixing leads to tough cookies, and nobody wants that.
- Rest the dough in the cold:
- Divide your dough in half, flatten each piece into a disc, wrap tightly in plastic wrap, and let them chill in the refrigerator for at least an hour. This gives the gluten time to relax and the flavors a chance to develop, plus it makes the dough way easier to roll out without sticking.
- Prepare your baking stage:
- Preheat your oven to 350°F and line two baking sheets with parchment paper while your dough chills. This keeps you from scrambling at the last minute and ensures your cookies bake evenly.
- Roll and cut with purpose:
- On a lightly floured surface, roll one disc of dough to about ¼-inch thickness—think of it as the thickness of a coin. Cut out your shamrocks and place them about an inch apart on the prepared sheets, leaving room for them to spread just slightly as they bake.
- Bake until golden whispers appear:
- Bake for 8 to 10 minutes—the edges should be just barely turning golden while the centers still feel soft. Pull them out a minute before you think they're done, because they'll continue cooking on the hot pan.
- Cool with patience:
- Let the cookies sit on the baking sheet for 5 minutes to firm up, then transfer them to a cooling rack to cool completely before icing. Trying to ice warm cookies is a recipe for disaster—the icing melts right off.
- Mix the icing to perfection:
- Combine your sifted powdered sugar, meringue powder, and vanilla in a bowl, then add warm water one tablespoon at a time while beating on low speed. You're looking for peaks that hold their shape but are still pipeable—it should look like thick, glossy frosting.
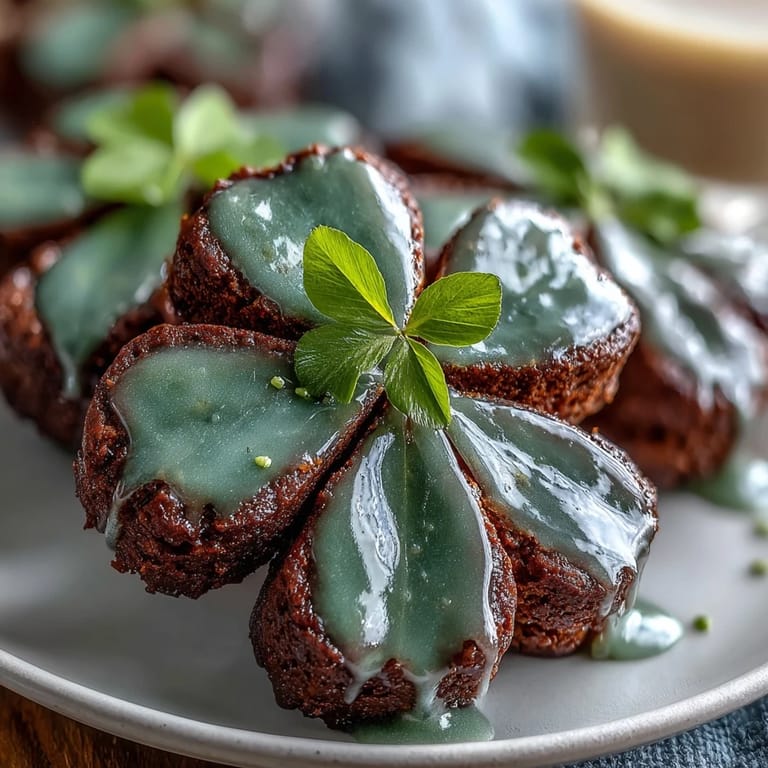
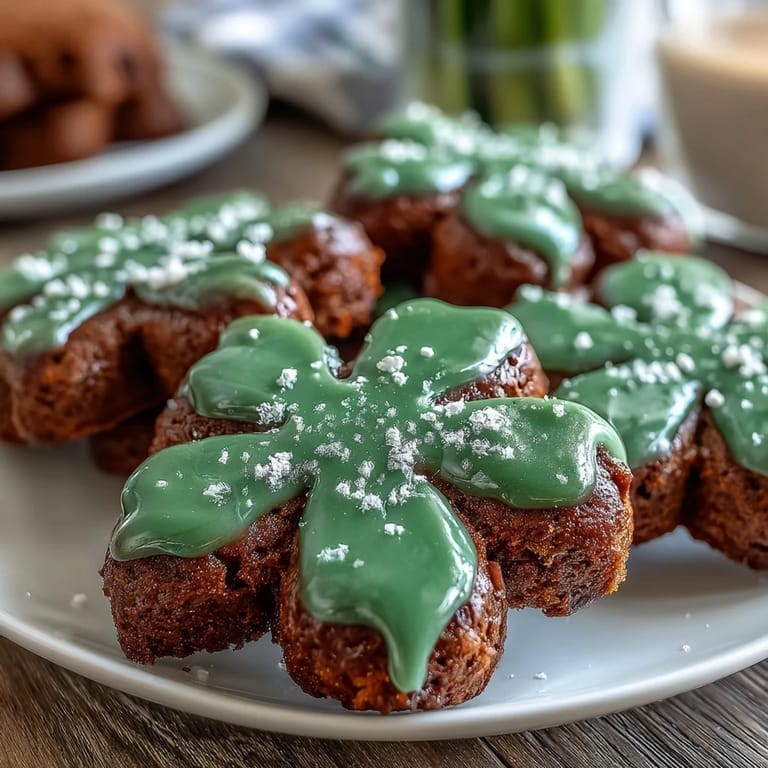
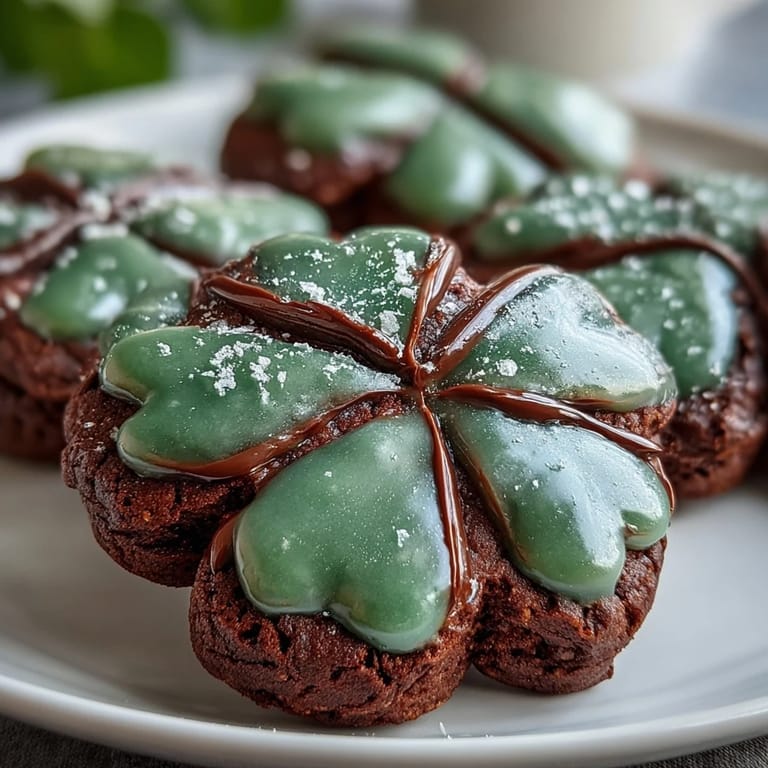
- Paint with green magic:
- Add your green gel food coloring drop by drop, stirring gently until you reach the shade of green you want—remember that it will dry slightly darker than it looks wet. Transfer the icing to your piping bag fitted with a small round tip and outline each cookie with steady pressure, then flood the inside with a thinner consistency of icing for that smooth, finished look.
- Let time do its work:
- Allow the icing to dry completely, which can take 2 to 4 hours depending on humidity in your kitchen—don't rush this part. Once it's set, you can layer on sprinkles, add details, or package them up for giving away.
 Save
Save The moment that really stuck with me was watching my five-year-old niece carefully decorate her first cookie, her tongue poking out in concentration as she outlined a shamrock in bright green. She couldn't have cared less about St. Patrick's Day or tradition—she just loved that she got to make something pretty that tasted good, and suddenly these cookies became about way more than green icing and festive occasions.
Flavor Twists Worth Trying
Once you nail the basic recipe, you can start playing with extracts and zests to make them feel different each year. I've swapped the almond extract for orange zest on a whim, and the brightness completely transformed the cookies without making them feel like a different recipe at all. Lemon zest works beautifully too if you're making these in spring and want something a little sharper, and I've even tried a tiny pinch of cardamom when I wanted something that felt more elegant and less candy-like.
The Royal Icing That Looks Like You Went to Pastry School
The secret to royal icing that actually looks professional is understanding that consistency is everything—too thick and you can't pipe it, too thin and it slides off the cookie like sad tears. I learned this by making exactly one batch that was too thin and watching it pool everywhere, which taught me to add water slowly and test the consistency by lifting a little bit on your spatula and letting it fall back. The meringue powder matters too, because it creates that hard, glossy finish that makes people think you spent hours in culinary school rather than just following a recipe on a random Tuesday afternoon.
- Test your icing consistency on a small section of a practice cookie before committing to the whole batch.
- Keep a damp paper towel nearby so you can immediately wipe away any icing mistakes before they dry.
- If your icing gets too thick while you're working, warm it gently by holding the bowl over a pot of warm water and stir slowly until it loosens up.
Storage and Gifting That Actually Works
These cookies stay fresh for up to five days in an airtight container at room temperature, and the hard icing actually protects them from drying out. I've shipped decorated cookies across the country in padded boxes with parchment paper between layers, and they arrived looking exactly as beautiful as when they left my kitchen. The key is making sure the icing is completely set before you pack them, and separating each cookie with something soft so they don't bump into each other during travel.
Pairing and Serving Ideas
These cookies are lovely on their own, but they become something special when paired thoughtfully with warm drinks or strong flavors that cut through the sweetness. Irish coffee with a shot of whiskey and whipped cream is the obvious choice, but I've also found that mint tea, hot chocolate, or even a crisp glass of sparkling cider brings out different notes in the cookies. For a St. Patrick's Day party, arrange them on a simple white plate with a few sprigs of fresh mint or a dusting of edible glitter, and watch people's faces light up when they realize something this beautiful is also homemade.
- Serve cookies at room temperature so the icing crackles pleasantly when you bite into them, creating that satisfying contrast with the soft cookie underneath.
- If you're gifting these, add a simple note about eating them within five days for peak freshness—people appreciate honesty about food.
- Make extra dough and freeze it flat between parchment sheets so you can bake fresh cookies whenever the mood strikes, even weeks later.
 Save
Save These shamrock cookies are proof that the best recipes are the ones you make again and again, gathering little memories and adjustments each time until they feel completely like yours. I hope they become part of your St. Patrick's Day tradition too, whether that means decorating with kids, gifting them to neighbors, or just having something beautiful and green in your kitchen when the mood strikes.
Recipe FAQs
- → How do I achieve soft sugar cookies?
Avoid overbaking by removing cookies when edges just start to turn golden. Chilling the dough also helps maintain softness.
- → What is royal icing made of?
Royal icing is a mix of powdered sugar, meringue powder, vanilla extract, and warm water beaten until stiff peaks form. It dries hard for detailed decoration.
- → Can I substitute almond extract in the dough?
Yes, lemon or orange zest can replace almond extract to add a fresh citrus twist to the flavor.
- → Why chill the dough before baking?
Chilling firms the dough, making it easier to roll and cut precise shapes without spreading too much while baking.
- → How long should the royal icing dry before handling cookies?
Allow royal icing to dry completely, usually at least a few hours, to ensure a firm surface suitable for packaging or stacking.