 Save
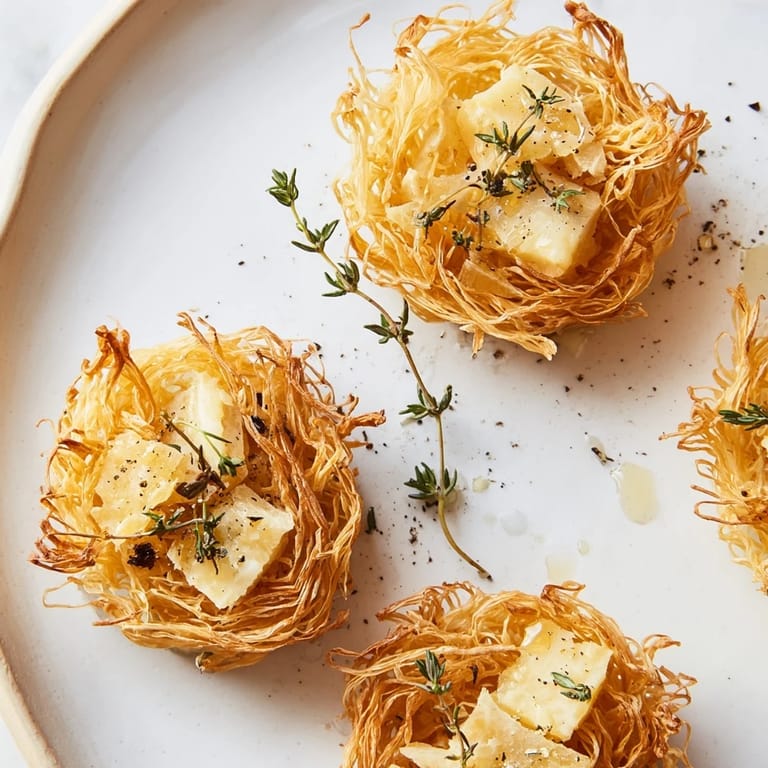
Save I discovered these crispy phyllo nests quite by accident one autumn afternoon when I was rummaging through my pantry and found a box of kataifi dough tucked behind the flour. My neighbor had just dropped off a wheel of aged gouda from a local farmstead, and I realized I had the perfect way to showcase it. Within an hour, I had golden, delicate nests crisping in the oven, and by evening, they'd become the star of an impromptu gathering that turned into one of those magical dinners where everyone lingered long after dessert.
The first time I served these to my friends Sarah and Marcus, Sarah actually closed her eyes after her first bite and said, "This tastes like a farmstand in July." Marcus, never one for sentiment, immediately reached for a second nest before anyone else had finished their first. That simple reaction made me realize these weren't just an appetizer—they were a conversation about good eating without pretense.
Ingredients
- Phyllo dough (kataifi): This shredded phyllo is your foundation—it bakes into these impossibly crisp, delicate nests that feel almost weightless on your tongue, and honestly, there's no good substitute for the real thing.
- Unsalted butter and olive oil: Together they create a rich golden color and that satisfying crunch, but don't skip the olive oil or your nests won't have quite the same character.
- Sea salt: A pinch is all you need to wake up the butter and bring out the cheese's natural complexity.
- Farmhouse cheddar: Look for an aged variety with some personality; the sharp tang will cut through the richness beautifully.
- Aged gouda: Creamy, slightly sweet, and it softens just enough from the warmth of the phyllo to be almost luxurious.
- Tomme de Savoie or semi-soft farmhouse cheese: This is your wild card—pick something with character that surprises you, maybe something local if you can find it.
- Fresh thyme, honey, and cracked pepper: These finishing touches turn a simple cheese and phyllo situation into something you'd find on a restaurant's cheese course.
Tired of Takeout? 🥡
Get 10 meals you can make faster than delivery arrives. Seriously.
One email. No spam. Unsubscribe anytime.
Instructions
- Heat your oven and prepare the phyllo:
- Preheat to 180°C (350°F). Gently loosen the shredded phyllo with your fingers—it'll want to clump, so be patient and work it apart almost like you're fluffing hair. Drizzle the butter, olive oil, and a tiny pinch of salt over it, then toss with your hands until every strand glistens.
- Shape your nests:
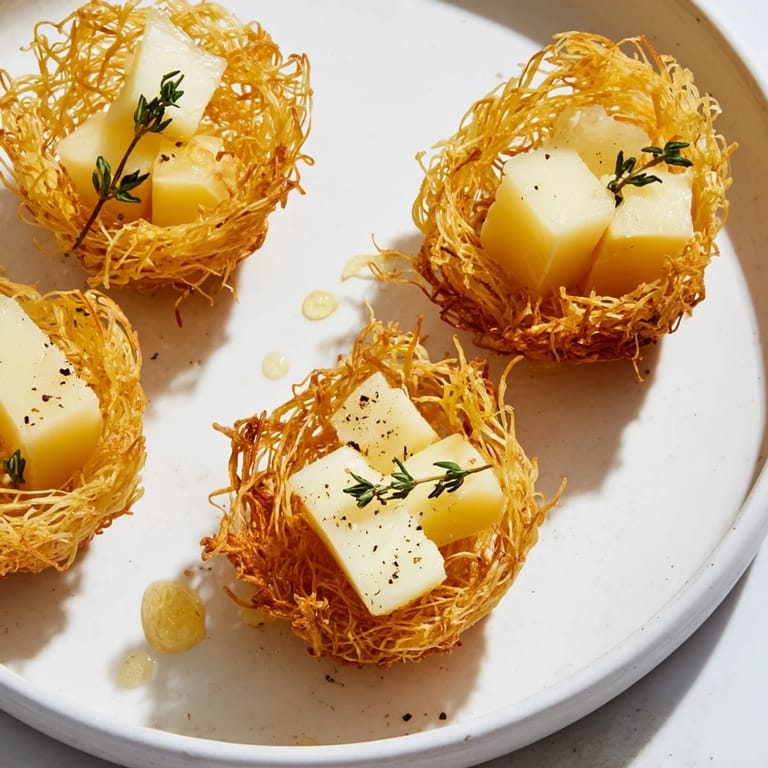
- Form small piles about 5–6 cm wide on parchment paper, pressing very lightly—you want them to hold shape but still feel delicate. Think of it as cradling rather than squishing.
- Bake until golden:
- Watch them closely for 10–12 minutes; they'll go from pale to deep golden pretty quickly. You're looking for that point where they're crisp all the way through but haven't darkened too much.
- Cool and crown with cheese:
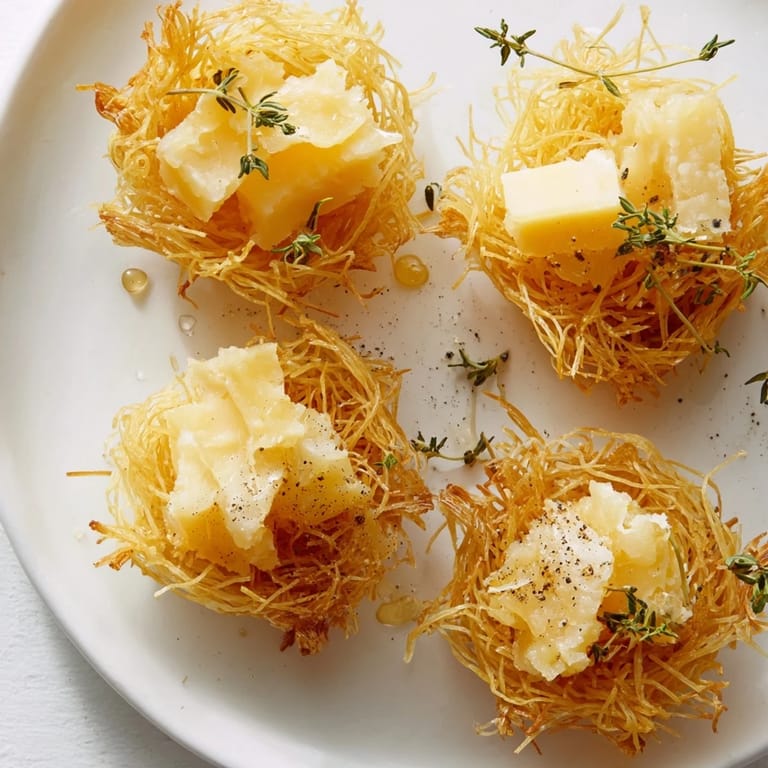
- Let them rest for a few minutes, then arrange on a board and top each nest with a rustic chunk of cheese. The slight warmth will soften the cheese just enough.
- Finish with grace:
- Scatter fresh thyme over everything, drizzle with honey if you're feeling it, and finish with cracked black pepper for a hint of bite.
 Save
Save There was this one evening when my daughter's art class came over for a critique session, and these phyllo nests somehow became the unexpected centerpiece of their whole evening. By the end of the night, they weren't just talking about color theory—they were debating which cheese was their favorite and asking for the recipe. That's when I knew these little bundles had transcended appetizer status and become something that brought people together.
Choosing Your Cheeses Wisely
The beauty of this recipe is that you're not locked into the three cheeses I've suggested. Think of it more as a principle: pick farmhouse cheeses with distinct personalities so each bite feels slightly different. Manchego brings a nutty warmth, Comté adds caramel notes, and a smoked farmhouse cheese lends unexpected depth. I've learned that the best cheese boards are conversations between different flavors, and that philosophy works perfectly here.
The Art of the Crisp
There's something meditative about watching phyllo transform in the oven. The butter and oil catch the heat, and what was damp and limp suddenly becomes this gossamer-thin, shattered-glass texture. I've found that the key is truly understanding your oven—some run hot, some cool. Start checking at the 10-minute mark, and trust what you see more than the timer. Your nose will tell you when they're ready too; there's a specific toasty, golden smell that signals perfection.
Serving and Variations
These nests are best served within a couple of hours of baking, though they'll stay crisp for longer if you keep them in an airtight container. I like to set up a little board with the nests, cheeses, thyme, and honey on the side so people can assemble them just before eating—it gives everyone agency and keeps the phyllo at its crispest. For a savory twist, dust the phyllo with herbes de Provence before baking, or serve alongside apple slices and grapes for brightness.
- If you're making these ahead, assemble the nests earlier but add the cheese and garnishes just before serving to preserve the crisp texture.
- Try mixing and matching cheeses based on what looks good at your local market or farmstand.
- A drizzle of aged balsamic over the honey creates an interesting sweet-and-salty depth.
 Save
Save These phyllo nests have become my quiet favorite way to entertain—they're simple enough not to steal my attention from the people I'm cooking for, yet they feel like a gift. There's something about serving food that looks like it belongs in a farmhouse kitchen, made with your own hands, that reminds everyone why we gather around tables in the first place.