 Save
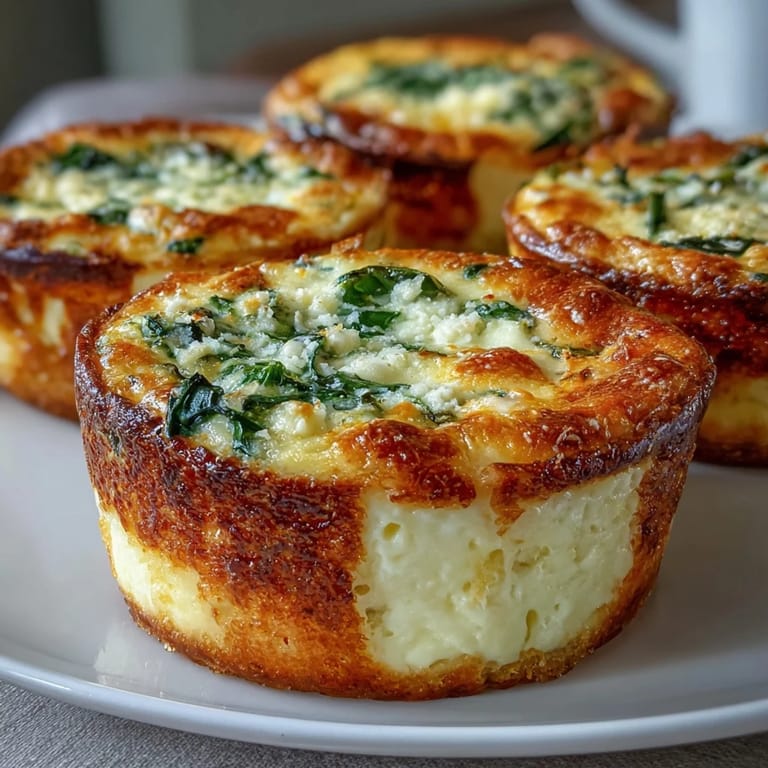
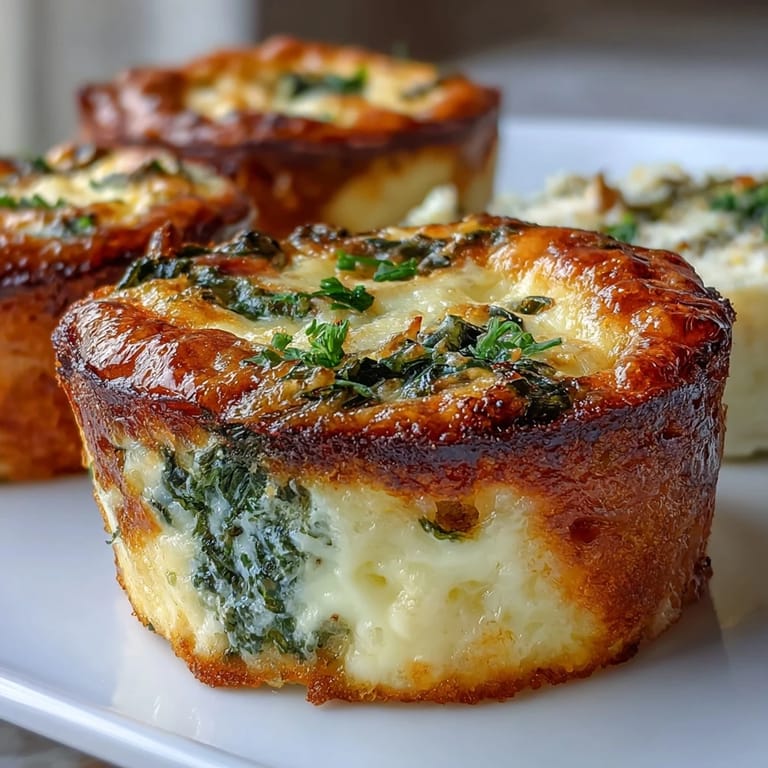
Save My friend texted me three weeks before her bridal shower asking if I could bring something that looked fancy but wouldn't stress me out in her tiny kitchen. I thought of these mini quiches—golden, elegant, and somehow both French and effortless. The first batch I made, I was honestly just experimenting with what fit in those tiny muffin cups, but when I pulled them out of the oven and saw them puffed up like little savory clouds, I knew I'd found something special. Now whenever there's a celebration that needs sophistication without the fuss, these are what I reach for.
I'll never forget pulling a tray of these out of the oven at that bridal shower while someone was mid-sentence talking about wedding favors. The smell hit the room and everything just stopped. Even the guests who said they weren't hungry suddenly had one in their hand, then another, and by the end of the hour I was getting asked for the recipe from women I'd just met. It became this little moment where food did what food does best—it brought people together without anyone overthinking it.
Ingredients
- Refrigerated pie crust (1 sheet, about 250 g): This is the secret shortcut that keeps the whole project manageable; homemade works beautifully too if you have time, but don't let that stop you from making these.
- Large eggs (4): They're the foundation of your custard filling, so use ones that are room temperature if you can—they whisk more smoothly that way.
- Heavy cream (1 cup or 240 ml): This is what makes the filling silky and rich; don't skimp or substitute with milk, because that's where the luxury lives.
- Whole milk (½ cup or 120 ml): This balances the cream so the quiches don't feel too heavy or separate during baking.
- Salt (¼ tsp) and ground black pepper (¼ tsp): Basic but essential; taste your filling before pouring it into the cups because seasoning is everything.
- Nutmeg (pinch): Just a whisper of this transforms the whole filling into something that tastes like you know what you're doing.
- Gruyère cheese (¾ cup or 75 g): Its nuttiness is exactly what these quiches need; it melts beautifully and doesn't overpower.
- Parmesan cheese (¼ cup or 25 g): This adds a sharp note that keeps everything from tasting flat.
- Bell peppers, spinach, green onions, bacon, or ham: These are your canvas—choose what feels right for the occasion or what you have on hand, but keep pieces small so they distribute evenly.
Tired of Takeout? 🥡
Get 10 meals you can make faster than delivery arrives. Seriously.
One email. No spam. Unsubscribe anytime.
Instructions
- Set your stage:
- Preheat your oven to 375°F (190°C) and lightly grease that 24-cup mini muffin tin with butter or oil. A little grease makes all the difference when you're trying to pop these out later without them sticking.
- Cut and nestle the pastry:
- Roll out your pie crust on a floured surface until it's about ⅛ inch thick, then use a 2½-inch round cutter to punch out 24 circles. Press each one gently into a muffin cup—they don't need to be perfect, just tucked in snugly enough to hold the filling.
- Make the custard magic:
- Whisk together your eggs, cream, milk, salt, pepper, and that pinch of nutmeg in a medium bowl until it's completely smooth and pale. This is the moment where you're building the actual flavor, so don't rush it and make sure you can't see any streaks of egg white.
- Build your flavor layers:
- Sprinkle a small amount of Gruyère and Parmesan into each pastry cup, then add a small pinch of whatever vegetables or meats you've chosen. This order matters because you want the cheese to stay slightly separate from the veggies so it melts evenly.
- Pour with intention:
- Carefully pour the egg mixture into each cup until it reaches just below the rim—they'll puff up as they bake, so leaving a tiny bit of space prevents overflow. Pour slowly and let the custard settle; this is worth taking your time over.
- Bake until golden:
- Slide the tin into your preheated oven for 22–25 minutes, watching until the tops are puffed and just barely golden. You'll know they're done when the centers have just the tiniest jiggle when you gently shake the pan, not when they're completely set.
- Rest and release:
- Let them cool in the tin for 5 minutes—this helps them firm up just enough to transfer without falling apart. Then use a small offset spatula or the tip of a knife to carefully pop each one onto a wire rack.
 Save
Save There was this moment at the bridal shower when an older woman took a bite of one, set down her champagne glass, and just said "Oh my God" quietly to herself. I realized then that these little bites had become more than just food—they were this tiny, edible moment of celebration that made someone feel special. That's what keeps bringing me back to this recipe.
Make-Ahead Magic
The best part about these quiches is that you can make them a full day ahead and just reheat them gently before serving, which means you can actually show up to your own event without stress. I usually store them in an airtight container in the fridge and then pop them into a 325°F oven for about 8–10 minutes until they're warm again—just enough to bring back that fresh-baked quality without drying them out. This flexibility is honestly why these became my go-to for any gathering where I want to look like I have everything under control.
Flavor Combinations That Work
The beauty of this recipe is that you can follow the ingredient list exactly or get creative based on what you have or what fits the mood of your gathering. I've done spinach and feta, roasted asparagus with prosciutto, caramelized onions with thyme, even just mushrooms for vegetarian guests. The key is keeping each add-in finely chopped so it distributes evenly and doesn't sink to the bottom or stick out awkwardly.
Serving and Pairing Ideas
These taste wonderful warm straight from the oven, but they're honestly just as elegant at room temperature, which makes them perfect for a buffet where you're not tethered to the kitchen. They pair beautifully with sparkling wine, mimosas, or even a light salad if you want to make it a more substantial brunch. I've also learned that presenting them on a small tiered stand or a pretty platter makes them look even more intentional and special.
- Serve them within an hour of reheating for the best texture, but they won't disappoint you if you need to keep them out a bit longer.
- A tiny fresh herb garnish like chives or dill on top right before serving adds a restaurant-quality touch that takes three seconds.
- These freeze beautifully too—just cool them completely, wrap tightly, and reheat from frozen at 325°F for about 12–15 minutes.
 Save
Save These mini quiches became my secret weapon for any celebration that needs to feel special without the stress. They're proof that sometimes the most impressive things we make are actually the simplest ones.
Recipe FAQs
- → What type of crust is best for mini quiches?
Refrigerated pie crust works well, but homemade or shortcrust pastry can also be used for a flaky, buttery base.
- → Can I make these ahead of time?
Yes, mini quiches can be baked a day early and gently reheated before serving without losing texture or flavor.
- → How do I customize the filling?
Mix and match diced vegetables like bell peppers, spinach, or green onions. Add cooked bacon or ham for extra savoriness, or omit meats for a vegetarian option.
- → What cheeses enhance the flavor best?
Gruyère and Parmesan add rich, nutty notes, but Swiss or cheddar can be substituted for different taste profiles.
- → How do I prevent the crust from becoming soggy?
Sprinkle a little shredded cheese over the crust before adding the filling. This helps create a barrier that maintains crispness.
- → What is the ideal baking temperature and time?
Bake at 375°F (190°C) for 22–25 minutes until puffed and golden brown to ensure a fully set filling and crisp edges.