 Save
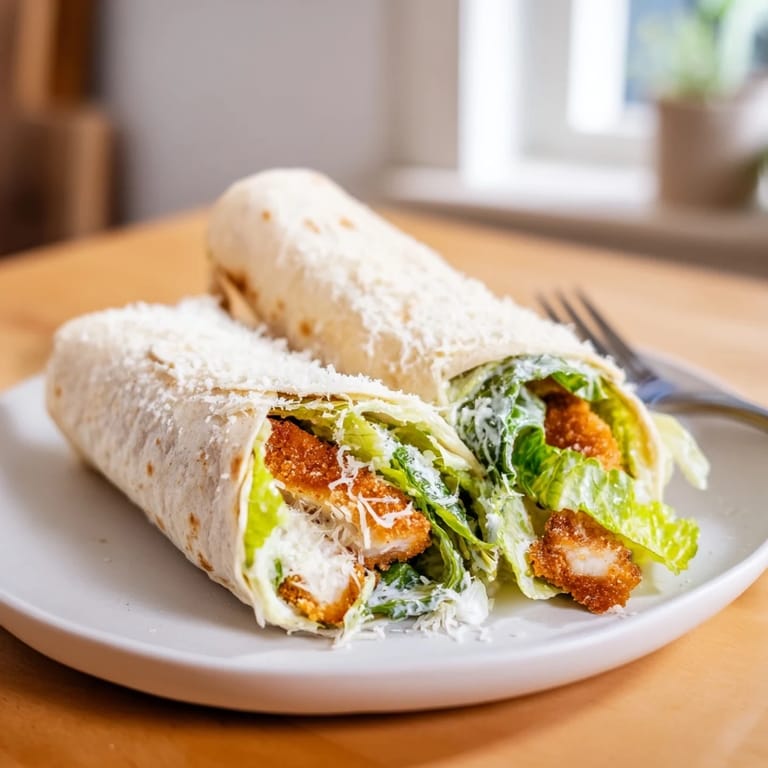
Save The sizzle caught my attention first, that unmistakable sound of chicken hitting hot oil. I was standing in my kitchen on a Tuesday night, craving something more exciting than my usual salad routine. I had romaine, I had tortillas, and I had chicken breasts that needed using. The idea hit me all at once: why not make the Caesar salad I loved into something I could actually hold? That first bite, with the crunch of the coating giving way to juicy chicken and cool, creamy lettuce, told me I'd stumbled onto something worth repeating.
I started making these wraps for my roommate during our late study nights in grad school. She'd walk in exhausted from the library, and I'd have these ready, wrapped in foil and still warm. The smell would fill our tiny apartment, and she'd always say the same thing: this is better than any campus food. We'd sit on the couch, unwrapping them like gifts, talking about our day between bites. Those wraps became our Thursday tradition, a small bright spot in the middle of stressful weeks.
Ingredients
- Boneless, skinless chicken breasts: The buttermilk tenderizes them beautifully, and slicing into strips ensures even cooking and maximum crispy surface area.
- Buttermilk: This is the secret to juicy chicken that stays moist even after frying, its acidity breaks down proteins gently.
- All-purpose flour: Creates the base coating that crisps up golden and holds onto all those seasonings.
- Breadcrumbs: Panko gives you extra crunch, but regular works fine if that is what you have on hand.
- Garlic powder: Adds savory depth without the risk of burnt garlic bits in your coating.
- Onion powder: Rounds out the flavor and adds a subtle sweetness that balances the garlic.
- Smoked paprika: Brings a hint of smokiness that makes the chicken taste more complex than it actually is.
- Salt and black pepper: Essential for bringing out all the other flavors in both the coating and the final wrap.
- Vegetable oil: Neutral flavor and high smoke point make it perfect for frying without any off tastes.
- Large flour tortillas: They need to be fresh and pliable or they will crack when you roll them, warming helps too.
- Romaine lettuce: The sturdy leaves hold up to the hot chicken and dressing without wilting into sad mush.
- Parmesan cheese: Freshly grated melts slightly against the warm chicken and adds that classic Caesar sharpness.
- Caesar dressing: The creamy, tangy glue that holds everything together, homemade or store bought both work wonderfully.
Tired of Takeout? 🥡
Get 10 meals you can make faster than delivery arrives. Seriously.
One email. No spam. Unsubscribe anytime.
Instructions
- Marinate the Chicken:
- Slice your chicken breasts into even strips so they cook at the same rate, then submerge them completely in buttermilk. Cover and let them soak in the fridge for at least 30 minutes, this is when the magic tenderizing happens.
- Prepare the Coating:
- Mix your flour, breadcrumbs, and all the seasonings in a shallow dish, using your fingers to break up any clumps. The shallow dish makes it easier to coat each strip evenly without making a mess.
- Coat the Chicken:
- Pull each strip from the buttermilk, letting excess drip off, then press it firmly into the flour mixture on all sides. Make sure every bit is covered or you will have bald spots that do not crisp up.
- Heat the Oil:
- Pour about an inch of oil into your skillet and heat it over medium-high until it shimmers and a pinch of flour sizzles immediately. If the oil is not hot enough, your chicken will absorb it and turn greasy instead of crispy.
- Fry the Chicken:
- Work in batches so you do not crowd the pan, laying strips gently into the oil and turning them after 3 to 4 minutes when the bottom is golden. The coating should sound crispy when you tap it with tongs.
- Drain and Rest:
- Transfer cooked chicken to a paper towel lined plate to drain excess oil. Let it rest for a minute so the coating sets and stays crunchy.
- Warm the Tortillas:
- Heat each tortilla in a dry skillet for about 20 seconds per side or wrap them in a damp towel and microwave for 30 seconds. This step prevents cracking when you roll them.
- Assemble the Wraps:
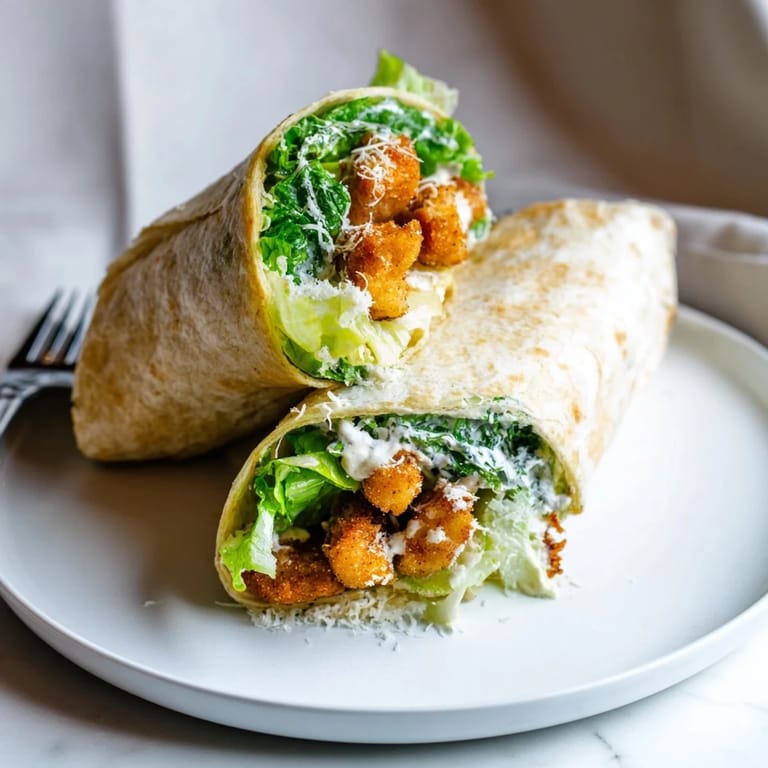
- Lay a tortilla flat and pile chopped romaine down the center, leaving space at the edges. Top with chicken strips, a generous sprinkle of Parmesan, and a good drizzle of Caesar dressing.
- Roll and Serve:
- Fold in the short sides first, then roll up tightly from the bottom, keeping everything tucked in as you go. Slice in half on the diagonal if you want, and serve right away while the chicken is still warm.
 Save
Save I brought these wraps to a potluck once, not sure how they would hold up next to all the fancy casseroles. They disappeared in ten minutes. People kept asking for the recipe, surprised that something so simple could taste this good. One friend said it reminded her of a wrap she used to get at a cafe in college, and that is when I realized food does not have to be complicated to become a memory. Sometimes it just needs to be delicious at the right moment.
Making It Your Own
The beauty of this wrap is how easily it adapts to what you have or what you are craving. I have added crispy bacon when I had leftovers, and the smokiness played beautifully with the Caesar dressing. Cherry tomatoes add a pop of freshness and acidity that cuts through the richness. If you want to skip the frying altogether, grilled chicken works too, though you lose that addictive crunch. Some nights I have thrown in thinly sliced red onion or even avocado, and each version felt like a small discovery.
Getting the Crunch Right
The crispiest chicken comes from patience and heat management. I learned this after a few batches that turned out limp and greasy because I was impatient and added too many strips at once. The oil temperature drops when you add cold chicken, so work in small batches and let the oil come back to temperature between them. You will hear the difference, a proper fry sounds loud and energetic, not a quiet sad simmer. If you have a thermometer, aim for 350 degrees, but if you do not, the flour test works perfectly.
Serving and Storing
These wraps taste best fresh, but life does not always cooperate with perfect timing. If you need to prep ahead, fry the chicken and store it separately from the other ingredients in the fridge. When you are ready to eat, reheat the chicken in a 400 degree oven for about 5 minutes to restore the crispness, then assemble. I have also packed these for lunch by keeping the components separate and assembling right before eating.
- Wrap them tightly in foil if you are taking them on the go, it helps hold everything together.
- Leftover fried chicken keeps in the fridge for 2 days and reheats beautifully in the oven or air fryer.
- If you have extra Caesar dressing, save it for dipping the wrap as you eat, it is a little indulgent but worth it.
 Save
Save Every time I make these, I am reminded that the best recipes are not always the ones that impress with complexity, but the ones you actually want to make again. This wrap has earned its place in my regular rotation, and I hope it does in yours too.
Recipe FAQs
- → How long should I marinate the chicken in buttermilk?
Marinate for at least 30 minutes for basic tenderness. For extra-tender, juicy chicken, refrigerate for up to 2 hours. The longer marination allows the buttermilk to break down the proteins and infuse flavor throughout the meat.
- → Can I use a different coating instead of panko breadcrumbs?
Yes, you can substitute with regular breadcrumbs, crushed crackers, or even cornflake crumbs for different textures. For a lighter option, try using just the seasoned flour without breadcrumbs, though you'll miss some of the signature crunch.
- → What's the best way to keep the wraps from falling apart?
Warm your tortillas before assembling to make them pliable and less likely to crack. Don't overfill—balance your ingredients evenly. Fold the sides in first, then roll tightly from the bottom up. Wrapping in foil or parchment paper helps hold them together if serving later.
- → Can I prepare these wraps ahead of time?
You can marinate the chicken and prep ingredients the day before. However, assemble wraps just before serving to prevent the tortilla from becoming soggy. If you must make them ahead, wrap tightly in foil and refrigerate for up to 4 hours, then unwrap and let sit at room temperature briefly before eating.
- → What's a good dairy-free alternative for the Caesar dressing?
Look for store-bought dairy-free Caesar dressings made with plant-based ingredients, or make your own using vegan mayonnaise, lemon juice, garlic, Worcestershire sauce, and nutritional yeast for a cheesy flavor. Many brands now offer excellent non-dairy versions.
- → How do I know when the chicken is cooked through?
Fry chicken strips for 3-4 minutes per side until the coating turns golden brown. Use a meat thermometer to confirm internal temperature reaches 165°F (74°C). The chicken should be opaque throughout with no pink inside when cut.