 Save
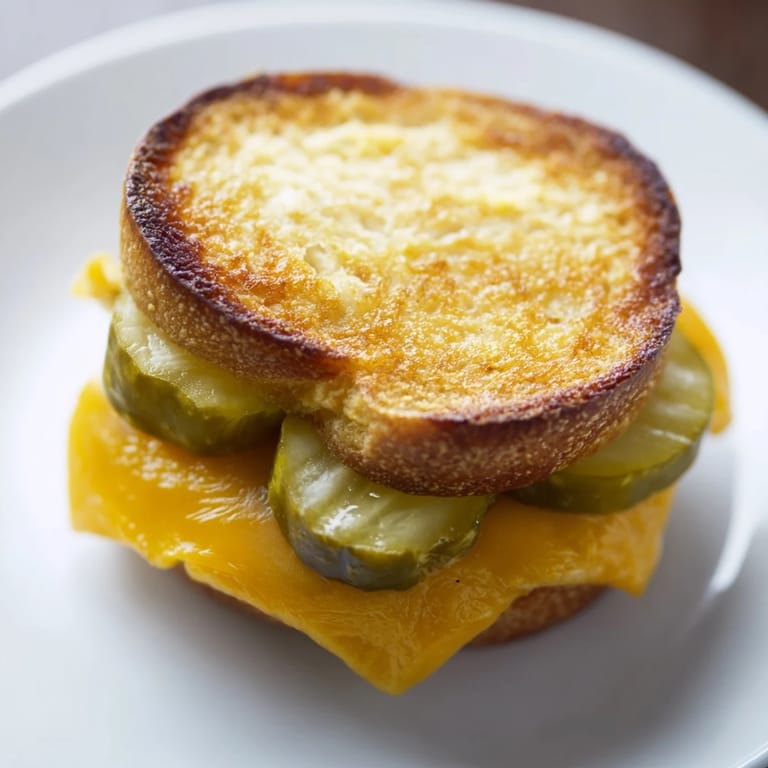
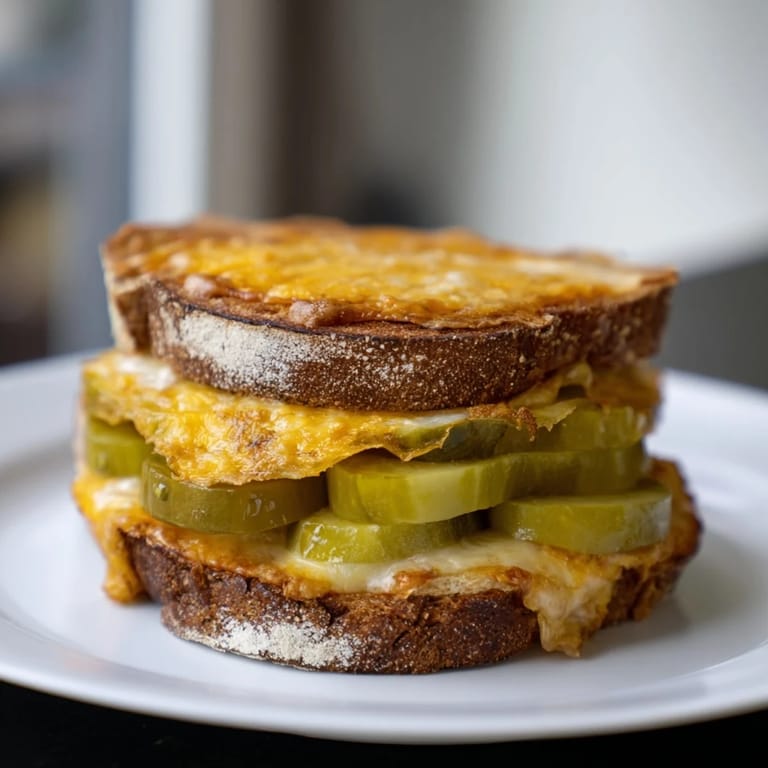
Save I discovered this pickle-and-cheese combo by accident one afternoon when I had sharp cheddar slices and half a jar of dill pickles staring at me from the fridge. Instead of making the usual sandwich, I decided to toast them together and watched the cheese melt around the pickle edges, creating this crispy-creamy hybrid that completely changed how I think about low-carb lunches. The tangy brine soaking into the melted cheddar was such a small moment, but it became one of those kitchen experiments I keep coming back to.
My friend Sarah came over during a hot summer when carb-loading felt impossible, and I threw this together mostly to prove that eating low-carb doesn't mean boring. Watching her bite into one and pause mid-chew while her expression shifted from skeptical to genuinely impressed is the moment I knew this recipe was worth keeping. She asked for it twice the next week.
Ingredients
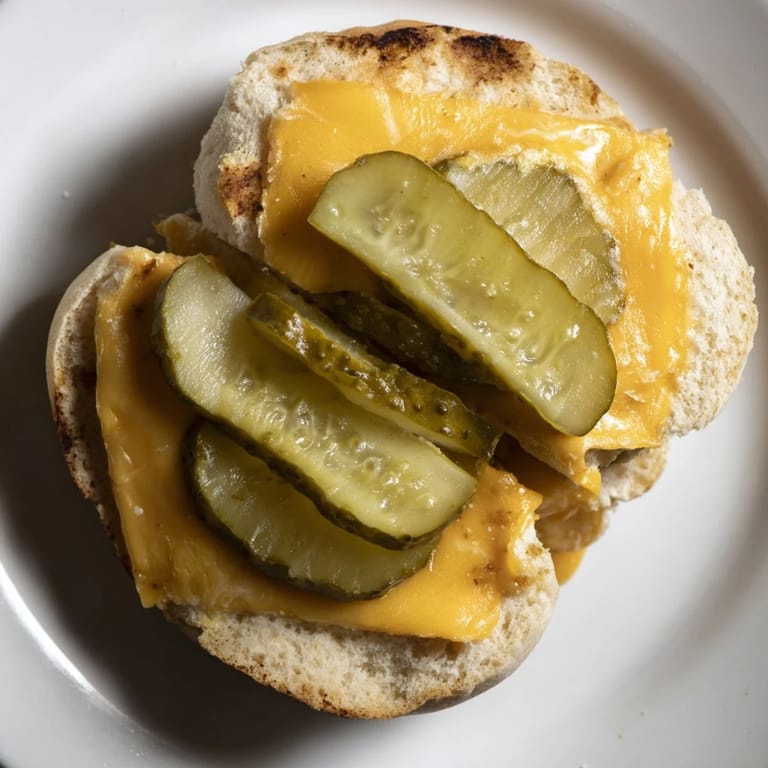
- Sharp cheddar cheese: Use slices about ¼ inch thick and at least 3-4 inches wide so they hold together as actual buns, not just melted puddles.
- Sandwich pickle slices: The long dill slices work best because they stay intact during baking; drain and pat them dry or the moisture will make everything soggy.
- Mayonnaise: A thin spread inside keeps the cheese buns from sticking together and adds richness, though it's completely optional.
- Dijon mustard: A teaspoon per sandwich gives tang that plays off the pickle brine beautifully.
- Tomato slices: Add a fresh element, but choose ripe, flavorful tomatoes or skip them entirely.
- Deli turkey or ham: Adds protein and substance, though the sandwich stands perfectly fine without it for vegetarians.
Tired of Takeout? 🥡
Get 10 meals you can make faster than delivery arrives. Seriously.
One email. No spam. Unsubscribe anytime.
Instructions
- Prep your workspace:
- Preheat the oven to 400°F and line your baking sheet with parchment paper. This prevents sticking and makes cleanup almost effortless.
- Build the base:
- Arrange 4 slices of cheddar on the sheet, spacing them so they have room to bubble without touching. This is the foundation everything else rests on.
- Layer the pickles:
- Take your drained pickle slices and lay them in a single overlapping layer right on top of each cheese slice, covering most of the surface. The overlap is key because the pickles will shift slightly as the cheese melts.
- Cap it off:
- Place another cheddar slice on top of each pickle layer, then press gently down so the pickles nestle between the cheese. Don't press hard or you'll squeeze out the brine.
- Bake until golden:
- Slide the sheet into the oven for 7-8 minutes, watching for the moment the edges turn golden and bubbly. You want the cheese melted and slightly browned but not burnt.
- Cool and set:
- Pull the sheet out and let the cheese buns sit for exactly 5 minutes so the cheese firms up enough to handle. This patience pays off because they'll hold together instead of falling apart when you assemble them.
- Add your fillings:
- Spread a thin layer of mayo and mustard inside each cheese bun if you're using them, then add tomato slices or deli meat as you like. The warm cheese will soften the toppings just slightly, which is perfect.
- Assemble and serve:
- Press two cheese-pickle buns together with your fillings in between and serve while everything is still warm and the cheese still has that slight give to it. Cold versions work too, but you lose some of the magic.
 Save
Save There was something quietly satisfying about sitting alone at my kitchen counter with a warm cheese-pickle sandwich, no bread guilt, just sharp flavors doing exactly what they should. It became one of those recipes I stopped overthinking and started actually enjoying.
Cheese Selection Matters
While sharp cheddar is the star, I've experimented with Swiss for a nuttier tone and provolone for something milder, and both work. The key is choosing cheese with enough character to hold its own against the tangy pickles. Avoid pre-sliced cheese from a package if you can because it often contains additives that affect how it melts and browns. A block of cheese sliced thick at the deli counter melts smoother and crisps better every time.
Pickle Juice Is Your Secret Weapon
I learned this by accident when I accidentally used undrained pickles and thought I'd ruined everything, but the pickle juice soaking into the warm cheese created this briny depth that made the whole thing taste better. Now I actually pat them dry before building but reserve a little of that juice to brush inside the buns after toasting if I want extra flavor. It's a small trick that elevates the whole sandwich without adding complexity.
Make It Your Own
The beauty of this recipe is how flexible it is within its constraints. Some days I add a few shredded lettuce leaves for crunch, other times I skip the fillings entirely and just eat the cheese-pickle buns as crispy little vehicles for flavor. Hot pickle varieties bring heat if you want it, and jalapeños work if you're craving something spicy.
- Shredded lettuce added just before assembling keeps things crisp without adding moisture.
- A sprinkle of black pepper or smoked paprika on the cheese before baking adds depth without changing the base recipe.
- Reheating in a toaster oven for 2-3 minutes restores crispness if you're eating leftovers the next day.
 Save
Save This sandwich proved to me that good food doesn't need to be complicated, just thoughtful. It's become my go-to when I want something quick that doesn't feel like I'm settling.
Recipe FAQs
- → What type of cheese is best for the buns?
Sharp cheddar cheese slices work best as they melt well and create a sturdy, flavorful bun.
- → Can I use other pickles besides dill?
Yes, spicy or bread-and-butter pickles can be used to add different flavor profiles.
- → How do I prevent the cheese buns from sticking?
Line your baking sheet with parchment paper or use nonstick spray before baking.
- → Are these buns suitable for gluten-free diets?
Yes, as they use only cheese and pickles, they are naturally gluten-free.
- → Can I prepare these ahead of time?
They are best served warm, but you can reheat them briefly in a toaster oven to restore crunch.