 Save
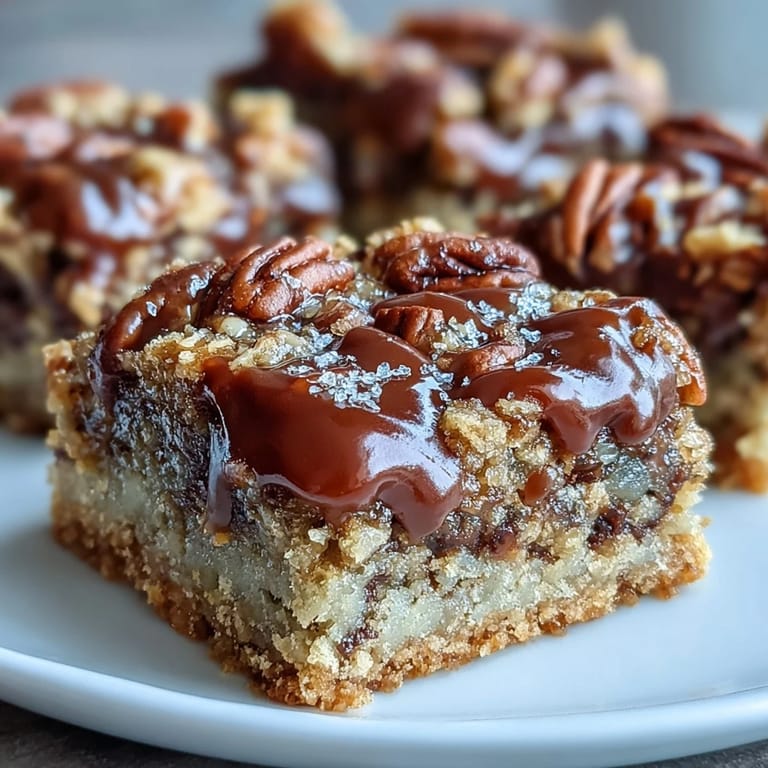
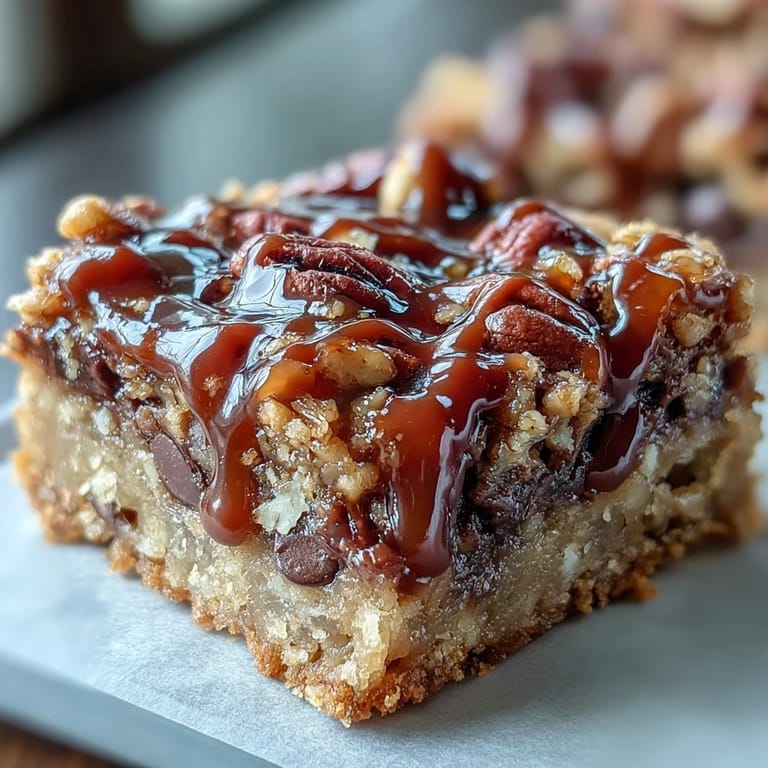
Save The smell of toasted pecans always takes me back to a quiet Saturday afternoon when I desperately needed something impressive but didn't want to fuss with layer cakes or fiddly pastries. I pulled out a baking pan, melted some butter, and started pressing oat crumbles into the bottom with my fingers. Thirty minutes later, I had golden bars oozing with caramel and studded with chocolate, and I've been making them ever since.
I once brought these to a potluck where someone mistook them for store-bought turtles and asked which bakery I'd visited. When I admitted I'd made them that morning, she scribbled down my number and asked for the recipe on the spot. That moment reminded me how a simple square pan and a few quality ingredients can create something people remember long after the last crumb is gone.
Ingredients
- All-purpose flour: Forms the tender base of the crust and gives structure to the crumble topping without making it tough.
- Rolled oats: Add a hearty chew and nutty flavor that balances the sweetness of caramel and chocolate beautifully.
- Packed brown sugar: Brings molasses depth and helps the crumble hold together while staying soft and chewy.
- Granulated sugar: Sweetens the crust cleanly and helps the topping turn golden and crisp in the oven.
- Unsalted butter, melted: Binds the crumble and keeps you in control of the salt level, especially if your caramel is already salted.
- Salt: A small pinch sharpens all the flavors and keeps the bars from tasting flat or one-note.
- Baking soda: Gives the crumble a slight lift and helps it turn golden without becoming dense.
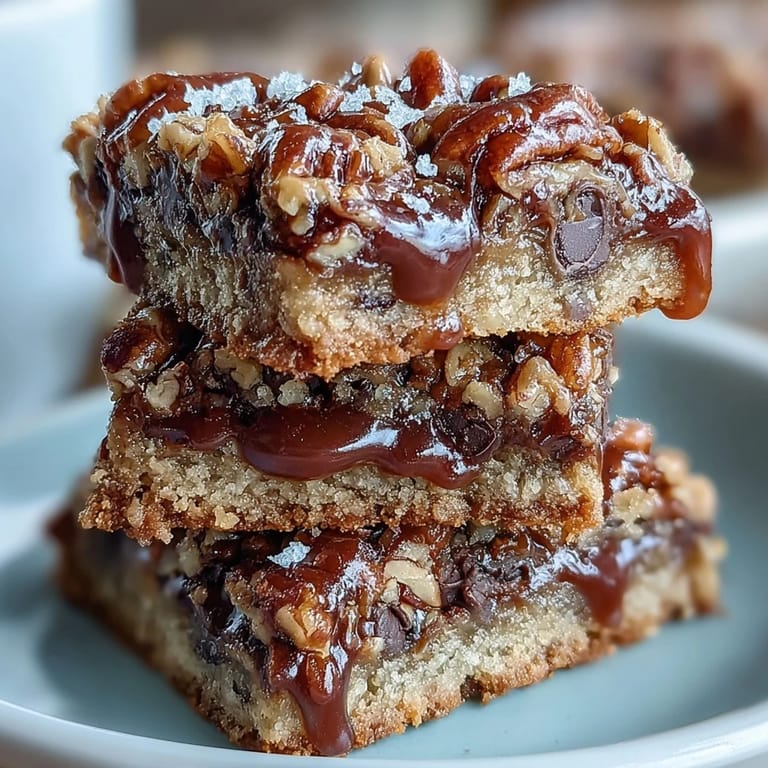
- Semi-sweet chocolate chips: Melt into puddles of rich chocolate that seep into every crevice and balance the caramel sweetness.
- Chopped pecans: Toast slightly in the oven and add a buttery crunch that echoes classic turtle candies.
- Caramel sauce: The soul of these bars, whether homemade or store-bought, it should be thick enough to cling without running off.
- Heavy cream: Loosens the caramel just enough to pour smoothly and creates a luscious, glossy finish.
Tired of Takeout? 🥡
Get 10 meals you can make faster than delivery arrives. Seriously.
One email. No spam. Unsubscribe anytime.
Instructions
- Prep Your Pan:
- Preheat your oven to 350°F and grease a 9x9-inch pan generously with butter, or line it with parchment paper for easy lifting. A well-prepared pan makes cutting clean squares effortless later.
- Mix the Crumble:
- In a large bowl, stir together the flour, oats, both sugars, melted butter, salt, and baking soda until the mixture looks like damp sand and clumps when you squeeze it. This crumbly texture is exactly what you want for both the crust and the topping.
- Form the Crust:
- Set aside 1 cup of the crumble mixture in a small bowl, then press the rest firmly and evenly into the bottom of your prepared pan. Use the bottom of a measuring cup to smooth it out if your hands start sticking.
- Bake the Base:
- Slide the pan into the oven and bake for 10 minutes, just until the edges begin to turn golden. This step sets the crust so it doesn't turn soggy under all that caramel.
- Warm the Caramel:
- While the crust bakes, combine the caramel sauce and heavy cream in a small saucepan over medium-low heat, stirring constantly until smooth and glossy. Remove from heat as soon as it's well blended to avoid scorching.
- Layer the Fillings:
- Pull the crust from the oven and immediately scatter the chocolate chips evenly across the hot surface, then sprinkle the chopped pecans on top. The residual heat will start melting the chocolate right away.
- Pour the Caramel:
- Drizzle the warm caramel sauce over the chocolate and pecans, letting it pool and seep into every gap. Work quickly so the caramel stays fluid and spreadable.
- Add the Topping:
- Sprinkle the reserved crumble mixture evenly over the caramel layer, covering as much surface as you can without pressing down. This top layer will bake into golden, crunchy clusters.
- Finish Baking:
- Return the pan to the oven and bake for 15 to 20 minutes, until the topping turns deep golden brown and the caramel bubbles gently at the edges. Watch closely in the final minutes to prevent burning.
- Cool Completely:
- Set the pan on a wire rack and let it cool fully before cutting, at least 30 minutes. Patience here rewards you with clean squares that hold their shape instead of oozing apart.
 Save
Save There's a moment when you pull these bars from the oven and the whole kitchen smells like a candy shop, all buttery sugar and toasted nuts. I once set a pan on the counter to cool and caught my neighbor peeking through the window, drawn by the scent alone. We ended up sharing a plate on the porch, and she told me it reminded her of her grandmother's pecan pralines, which made me realize food has a way of bridging generations without even trying.
How to Store and Serve
These bars keep beautifully in an airtight container at room temperature for up to a week, though they rarely last that long in my house. If you want to dress them up, drizzle melted chocolate over the cooled bars in a quick zigzag pattern, or dust them lightly with flaky sea salt for a sophisticated finish. They travel well to picnics and bake sales, and they taste even better the next day once the flavors have melded together.
Swaps and Variations
If pecans aren't your favorite, walnuts or sliced almonds work just as well and bring their own distinct flavor. For a salted caramel version, sprinkle a generous pinch of flaky sea salt over the caramel layer before adding the crumble topping. You can also swap the semi-sweet chocolate chips for dark chocolate or white chocolate, depending on your mood and what's in your pantry.
Troubleshooting and Final Touches
If your caramel sauce is too thick to pour, just whisk in another tablespoon of heavy cream over low heat until it loosens up. If the topping browns too quickly, tent the pan loosely with foil for the last few minutes of baking. When cutting, use a sharp knife wiped clean between each slice to keep the layers neat and the chocolate from dragging.
- Warm the knife under hot water and dry it before each cut for the cleanest edges.
- Store cut bars between layers of parchment paper to prevent them from sticking together.
- If you have leftover caramel, save it for drizzling over ice cream or stirring into coffee.
 Save
Save Once you've made these bars a few times, you'll start tweaking them to suit your own taste, adding a little more salt or swapping in your favorite nuts. That's the beauty of a recipe that feels like yours from the very first bite.
Recipe FAQs
- → Can I use homemade caramel instead of store-bought?
Yes, homemade caramel works beautifully. Simply combine it with heavy cream as directed to achieve the right consistency for pouring over the chocolate and pecans.
- → How do I prevent the bars from sticking to the pan?
Line your 9x9-inch pan with parchment paper, leaving overhang on two sides for easy lifting. Alternatively, grease the pan thoroughly with butter before pressing in the crust.
- → Can I substitute the pecans with other nuts?
Absolutely. Walnuts or almonds make excellent substitutes and maintain the same texture and flavor profile. Use the same quantity as the pecans called for.
- → How should I store leftover turtle bars?
Keep the bars in an airtight container at room temperature for up to one week. For longer storage, refrigerate them for up to two weeks or freeze for up to three months.
- → Why do the bars need to cool completely before cutting?
Cooling allows the caramel and chocolate to set properly, making clean cuts possible. Cutting while warm will cause the layers to ooze and create messy, uneven squares.
- → Can I add a salted caramel twist to these bars?
Yes, sprinkle a pinch of flaky sea salt over the caramel layer before adding the crumb topping. This enhances the sweet-salty contrast and elevates the overall flavor.