 Save
Save I discovered this recipe by accident at a friend's dinner party where someone had left a bowl of chocolate-covered potato chips on the counter. The contrast between the crispy, salty chip and the smooth, melting chocolate was so unexpected that I spent the rest of the evening thinking about it. That night, I went home and started experimenting with the balance of salt and sweetness, realizing that the simplest combinations often make the most memorable treats. Now it's become my go-to when I need something that feels both indulgent and effortless, ready in less time than it takes to watch a favorite show.
I made this for my nephew's birthday party last spring, and watching the kids break into pieces with their hands while chocolate smudged their cheeks reminded me why simple food tastes better when shared. One kid asked if we'd "bought it from a fancy store," which was the best compliment I could have gotten knowing it took me barely half an hour from start to finish.
Ingredients
- High-quality dark or milk chocolate, 300 g chopped: This is where the magic happens, so don't skimp on quality—cheap chocolate tastes waxy and won't melt smoothly.
- Plain salted potato chips, 150 g: The saltiness in the chips does half the work, so avoid unsalted varieties or you'll lose that perfect tension between sweet and salty.
- Flaky sea salt, 1 tsp: The coarse crystals matter because they crunch between your teeth and don't dissolve into the chocolate like table salt would.
Tired of Takeout? 🥡
Get 10 meals you can make faster than delivery arrives. Seriously.
One email. No spam. Unsubscribe anytime.
Instructions
- Prepare your canvas:
- Line a baking sheet with parchment paper so the chocolate won't stick and you can break it into pieces cleanly later.
- Melt the chocolate gently:
- Use a double boiler or microwave in 30-second bursts, stirring between each pulse until the chocolate is completely smooth—overheating makes it grainy and temperamental. You want it warm enough to pour but not so hot it shatters the chips.
- Layer the chips:
- Spread the potato chips in a single layer on the parchment, letting them overlap slightly so they hold together better once chocolate sets. Don't compress them or they'll lose their crunch.
- Coat with chocolate:
- Pour the melted chocolate slowly over the chips and use a spatula to gently push it into the gaps and over the surfaces. Work while the chocolate is still warm, or it'll start setting and drag.
- Add the salt while warm:
- Sprinkle the flaky sea salt over the chocolate immediately while it's still soft enough for the crystals to stick. This timing is what makes it adhere instead of sliding off.
- Chill until set:
- Pop the baking sheet into the refrigerator for about 30 minutes—the chocolate will firm up and the chips will regain their snap. You'll know it's done when you can break a piece and it cracks cleanly.
- Break and serve:
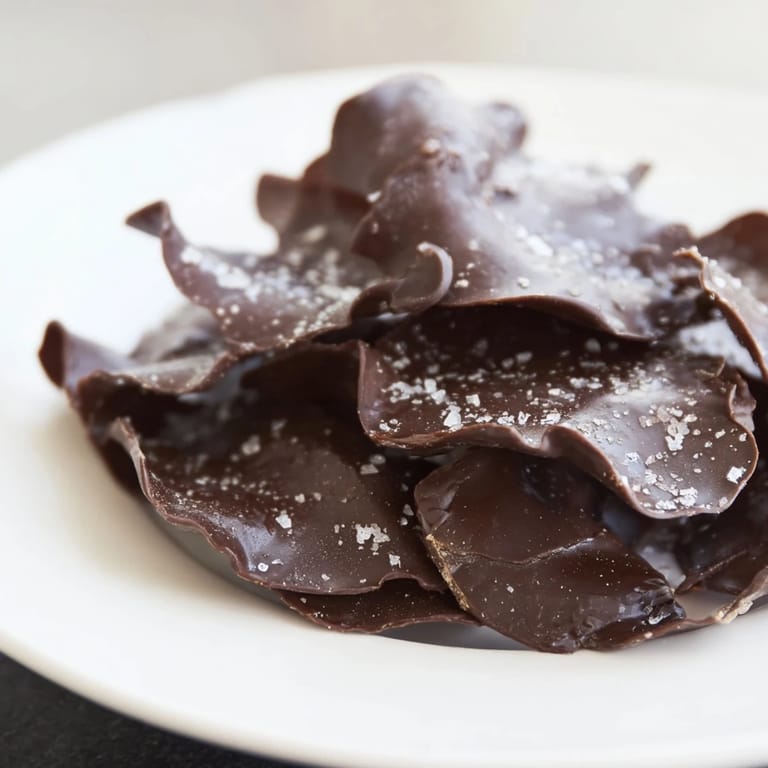
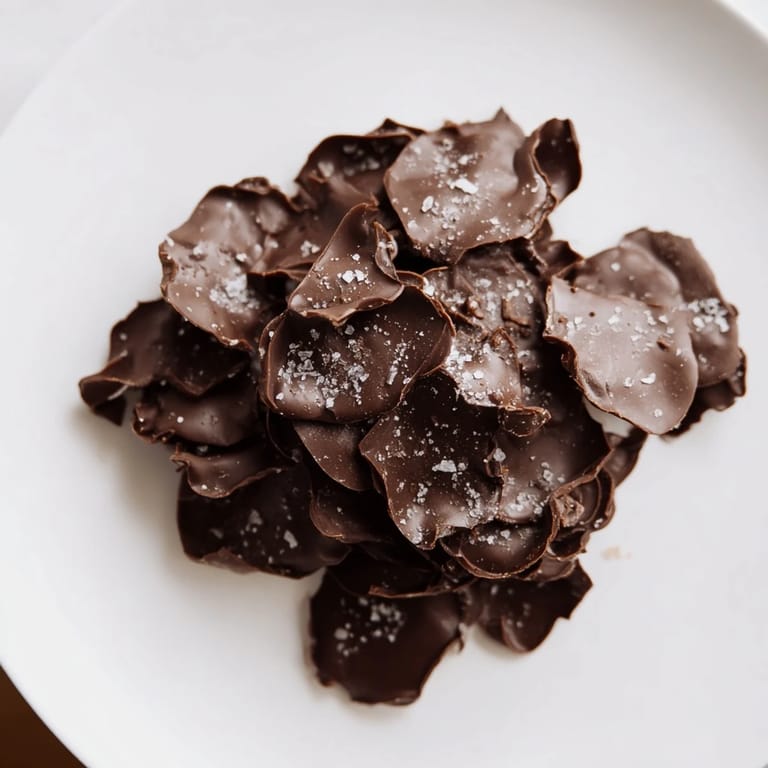
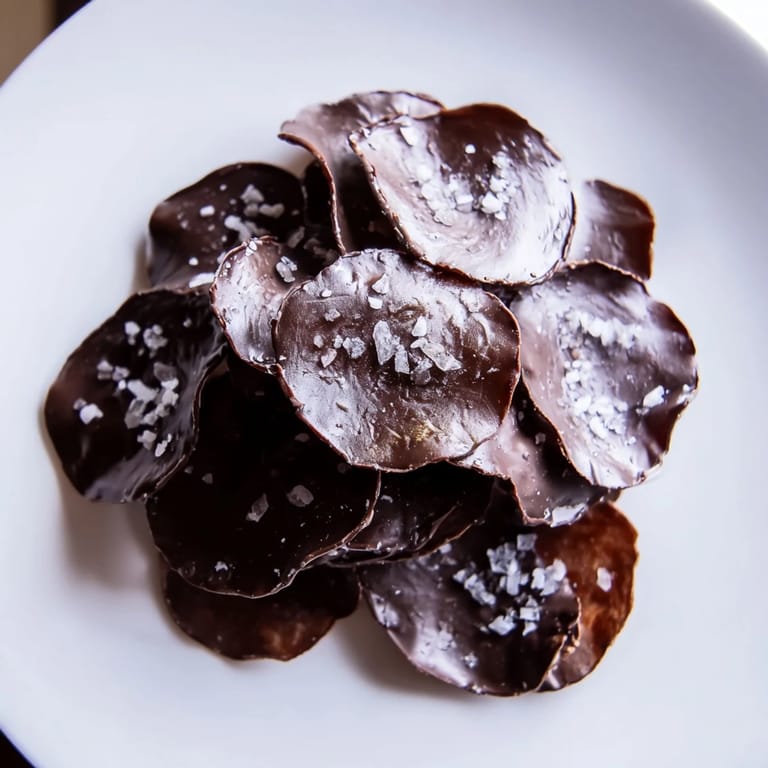
- Once fully set, break the bark into irregular pieces with your hands for that rustic look that makes people think you know what you're doing.
 Save
Save The first time I served this at a gathering, someone asked if I'd made it myself or bought it from a specialty shop, and I realized right then that the simplest recipes often feel the most luxurious. It became the thing people specifically asked me to bring, which taught me that you don't need complicated techniques to make food memorable.
Flavor Variations Worth Trying
Once you've nailed the basic version, the fun begins. I've layered a drizzle of white chocolate on top after the dark chocolate sets, which gives it a marbled look and adds a creamy sweetness that cuts through the salt beautifully. You can also swap kettle-cooked chips for the crinkled ones if you want maximum crunch, or even try sriracha or wasabi chips if you're feeling adventurous and want heat to play with the sweetness.
Storage and Make-Ahead Tips
This bark keeps remarkably well in an airtight container at room temperature for up to four days, which makes it perfect for meal prep or last-minute gifts. I've found that keeping it in a cool cupboard rather than the fridge prevents condensation from making it sticky, and it actually tastes better at room temperature because the chocolate melts slowly on your tongue instead of arriving hard and cold.
The Small Details That Matter Most
The difference between bark that feels homemade and bark that feels thoughtful comes down to the details you choose to pay attention to. The quality of your chocolate, the type of chips you select, and even the way you break it into pieces all send a message about how much care went into it.
- Check your chocolate for any white bloom (a chalky coating) before buying, which means it's been stored poorly and might not melt smoothly.
- Slightly overlap your chips rather than laying them flat in a single layer, so they stay connected once the chocolate sets.
- Use your hands to break the bark into uneven pieces—it looks more artisanal than using a knife, and you won't shatter the chocolate.
 Save
Save This recipe taught me that sometimes the best things come from paying attention to accidents and small moments in the kitchen. Make it, share it, and watch people's faces light up when they realize something this good took you barely any time at all.
Recipe FAQs
- → What type of chocolate works best?
High-quality dark or milk chocolate provides a rich flavor and smooth texture when melted.
- → Can I use different kinds of chips?
Yes, kettle-cooked or ridged potato chips add extra crunch and a robust salty note.
- → How do I melt chocolate properly?
Use a double boiler or microwave in short bursts, stirring frequently for smooth and even melting.
- → Why is sea salt sprinkled on top?
Flaky sea salt enhances the flavor by adding a subtle, savory contrast to the sweetness.
- → How should I store the finished bark?
Keep it in an airtight container at room temperature for up to 4 days to maintain freshness and crunch.